
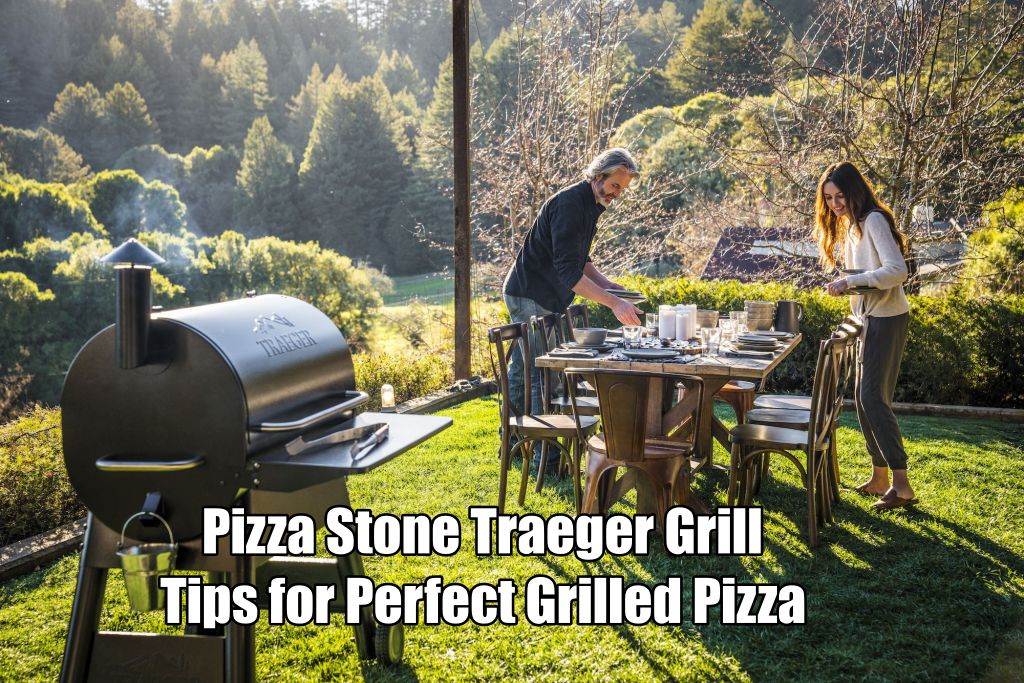
Making pizza on a Traeger grill can give it a delicious smoky flavor. But you need a pizza stone to make it work. The grill’s metal grates will let the pizza fall through. A pizza stone sits on top of the grates. It gives the pizza a solid surface to cook on.
The stone absorbs heat from the grill. Then it spreads the heat evenly over the pizza. This lets the crust get crispy and the cheese melt perfectly.
You have to pick the right pizza stone for your Traeger grill. Make sure you get one that fits your grill size. Check what material it’s made of too. Some materials hold heat better. Also look at how thick it is. Thicker stones hold heat longer.
There are lots of good Traeger pizza stones to choose from. Any of them will help you cook amazing pizza on your grill. The stone turns the grill into a pizza oven. It gives the pizza a crispy crust and smoky flavor.

Why use a pizza stone on a Traeger grill?
Using a pizza stone on your Traeger grill can make your pizza incredible. The stone helps bake the pizza perfectly. It spreads the heat from the grill all over the pizza evenly. This gives you an evenly crispy crust everywhere.
The stone also takes moisture out of the dough as it bakes. This makes the crust nice and crisp. The stone keeps heat very well too. So the pizza stays hot while you eat it.

With even baking, moisture control, and heat retention, the stone can make your pizza as good as a restaurant’s. Basically, the pizza stone is your secret weapon. It can turn basic pizza into something amazing on your Traeger grill. The stone takes your pizza game to the next level.
Benefits Of using Pizza Stones for pizza making


Add toppings after the dough is on the stone
Toppings should always be added after the dough has been placed onto the pizza stone. This helps to prevent any potential sticking, as well as ensuring that all of your ingredients are fully cooked when finished. As a general rule of thumb, you should avoid adding too many toppings; a busy pizza can make it difficult to get an even cooking result without burning or undercooking certain areas.
Choosing the right pizza stone for Traeger?
First, get a stone made specifically for grilling – not just any pizza stone. Look for one with insulating material on the bottom to protect the stone from direct grill heat. This helps the stone heat more evenly and slowly.
Second, choose a stone that is at least 1/2 inch thick. Thicker stones retain heat better and are more durable for repeated use on the grill. They also take longer to heat up, so preheat the stone thoroughly.

Third, make sure the stone is large enough to accommodate your desired pizza size with a couple inches of space on all sides. Standard sizes range from 12 to 16 inches in diameter. Measure your pizza dough before buying.
Fourth, avoid porcelain or ceramic pizza stones for the grill. Go with high-temperature cordierite stones rated for over 1,000 degrees Fahrenheit. These can withstand the intense heat of a Traeger.
Fifth, ensure the stone comes with a detachable lip or handles for easy lifting on and off the grill. This will make installing and removing the hot stone much safer.
So choose wisely when selecting the ideal size and material that best suits your needs – enjoy grilling the perfect pizza using your Traeger and pizza stone.
Best preheating temperature for Traeger and stone?
For optimal results, preheat your Traeger grill to at least 500 degrees Fahrenheit and the pizza stone to between 425 to 550 degrees Fahrenheit. Here are the recommended steps:
Set your Traeger to its highest temperature setting, usually between 500 to 550 degrees. Let it preheat for at least 20 minutes to come up to temperature.
Place the pizza stone directly on the grill grate and close the lid. Some pizza stones come with legs that lift it slightly above the grate.

After 10 to 15 minutes, check the stone’s temperature with an infrared thermometer gun.You want the stone to be at least 425 degrees Fahrenheit.
If the stone is not hot enough after 15 minutes, leave it on the grill for another 5 to 10 minutes to continue heating. Rotate the stone 180 degrees halfway through preheating for even heating.
Once the stone reaches the desired 425 to 550 degree range, it is ready to cook your pizza. The higher end of that range will result in a crisper crust but the pizza will cook faster.
For best results, open the grill lid as few times as possible while preheating and while cooking the pizza to maintain an ideal cooking temperature.
Preparing pizza dough for Traeger grilling
Preparing pizza dough for grilling on a Traeger is key to achieving that delicious and crispy crust. Here are some tips to help you get started:
– Use room temperature ingredients such as yeast, flour and water. This will make it easier to knead the dough and form an even texture throughout.
– Knead the dough for several minutes until it becomes smooth and elastic – this will help ensure an even bake when cooked on your Traeger grill.
– Let the dough rest after kneading; doing so helps develop the gluten structure which leads to a more flavorful crust with a crispier texture.
– Form your pizza base into whatever shape you desire – round, square or rectangular are all viable options here! Make sure not to handle it too much though; overworking the dough can cause it to become tough when grilled.
– Keep in mind that using different toppings will have an effect on baking time; opt for simple recipes if you’re just starting out with grilled pizzas on your Traeger!
– Place your pizza onto a hot preheated pizza stone before placing it onto the grill surface – this helps prevent sticking while ensuring evenly cooked toppings throughout.. Toppings should always be added after the base has been cooked to avoid burning them.
With the proper preparation and care, you can easily create delicious pizzas with a perfectly charred crust using your Traeger grill and pizza stone! Enjoy grilling your favorite pizza recipes in no time.
How to transfer pizza to the stone smoothly?
Transferring pizza to the stone smoothly can be accomplished with a few simple steps. Here’s what you need to do:
– Preheat your Traeger and pizza stone according to the manufacturer’s instructions; this usually takes 20 minutes of mid-temperature heating (400°F-450°F).
– Prepare your pizza dough beforehand, kneading until it becomes smooth and elastic.
– Form the dough into whatever shape desired – round, square or rectangular works best – before adding any toppings. Handle as little as possible to avoid making the crust too tough when grilled.

– Place your prepared pizza onto a hot preheated stone before transferring it onto the grill surface; this will help prevent sticking and ensure an even bake throughout. Do not add any toppings yet!
– Gently slide or transfer your dough from the board directly onto the preheated stone on the grill surface – careful not to drop it!
– Bake for 5 minutes at 400°F before adding desired toppings, then finish grilling until cheese is melted and crust has reached desired texture/charring level (usually 12 minutes in total). Remember that cooking time may vary depending on size of pizza, ingredients used, etc.
By following these simple steps, you can easily transfer pizza to the stone and get all the delicious flavor of Traeger grilling with a crispy crust! Enjoy creating your own pizzas and experimenting with different flavors.
Pizza cooking time on Traeger with a stone?
Making pizza on your Traeger grill using a pizza stone allows you to achieve the coveted wood-fired taste and texture.
- Preheating the Grill and Pizza Stone:Making pizza on your Traeger grill using a pizza stone allows you to achieve the coveted wood-fired taste and texture. For best results, start by preheating your Traeger and pizza stone together foraround 20 minutes at 400-450°F.
- Preparing the Pizza Dough:While the grill and stone heat up, prepare your pizza dough. Knead it well until smooth and elastic then shape into a flattened round or rectangle.
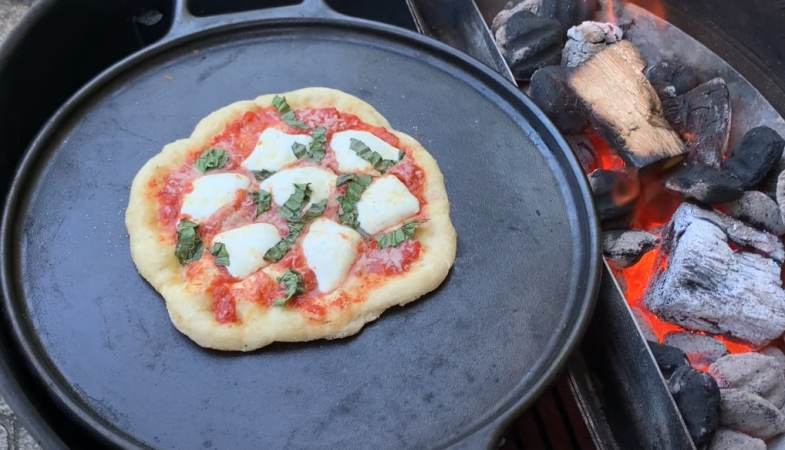
- Baking the Dough on the Stone:Once the stone reaches the target temperature, gently transfer the shaped raw dough directly onto it before adding any toppings. Let the naked dough bake for about 5 minutes to firm up the crust.
- Adding Toppings and Final Grilling:Next, add your favorite toppings and continue grilling until the cheese melts and the crust edges char to your desired doneness, typically another 10-12 minutes.
- Monitoring and Adjusting:Cooking time can vary based on pizza size, ingredient choices, and grill temperature so keep an eye on it. If juices pool in the center, increase heat slightly. And for extra crispy crusts, try a hotter preheat. With the right prep and timing, you’ll be amazed by the incredible, restaurant-quality pizzas you can create on your Traeger with a simple pizza stone accessory.
Adjusting heat for even pizza cooking
Adjusting the heat to ensure even pizza cooking on your Traeger grill with a pizza stone will help you get the best results possible. Here are a few simple steps for getting perfectly cooked and charred crust:
– Preheat your Traeger and pizza stone before cooking, usually taking 20 minutes at mid-temperature (400°F-450°F).
– Prepare dough beforehand, kneading until smooth then form into desired shape before adding toppings.
– Place prepared pizza onto hot preheated stone before transferring onto grill surface; do not add any toppings yet!
– Gently slide/transfer dough from board directly onto preheated stone on the grill surface – careful not to drop it!
– Bake for 5 minutes at 400°F before adding desired toppings then finish grilling until cheese is melted and crust has reached desired texture/charring level (usually 12 minutes in total). Remember that cooking time may vary depending on size of pizza, ingredients used, etc.
– Increase or decrease preheating temperature depending on how long it takes for each slice’s juices to be cooked through; too low setting won’t cook them properly while too high could burn them.
By following these steps, you can use your Traeger grill with a pizza stone to make the perfect pizza every time. Enjoy experimenting with different flavors and cooking times for an exciting grilling experience!
Removing pizza from the stone safely
Removing pizza from the stone safely requires the right tools and techniques to ensure that your pizza comes out perfectly cooked with a crispy crust. Here’s what you need to do:
– Once the cheese has melted and reached desired texture/charring level, use a metal spatula or tongs to gently lift around the edges of the pizza and make sure it isn’t stuck onto the stone.
– Move your spatula or tongs around in an even circular motion – being careful not to tear/burn yourself – until all parts of your pizza are released from sticking points on the stone.
– Gently slide or scoop away any remaining pieces, then transfer your grilled masterpiece onto a heatproof spatula for easy serving and cutting.
– Let cool for 5 minutes before cutting into desired slices; this will prevent juices from spilling into other areas and ruining flavor when served.
– Remember that transferring pizzas can be tricky business so it’s important not to rush – take your time!
– When finished eating, let cool completely before removing excess debris from grill surface and cleaning up as usual; make sure any residual oils used during cooking have been wiped off with paper towels prior to storing away for next time.
Pizza stone cleaning and maintenance tips
Pizza stone cleaning and maintenance tips:
– Clean your pizza stone with hot water and a gentle brush once the cooking is done.
– Use a paper towel to remove any excess oil or residue that may have been left behind from grilling.
– Let it dry completely before putting away in storage; be sure to cover with plastic wrap if needed.
– When storing, keep away from extreme temperatures like direct sunlight or freezing temperatures.
– From time to time, use an approved stone cleaner spray for deeper cleanings if needed; never use harsh chemicals such as chlorine bleach which can damage the surface of the pizza stone.
– To prevent cracking while cooking pizzas larger than 18 inches, make sure to flip it onto its side every few minutes then switch its position back again every few minutes more until cooked through completely – this will help distribute heat evenly throughout the entire surface area of your pizza stone!
– Always preheat your Traeger grill with the pizza stone before adding toppings for best results (usually 20 minutes at mid temperature); this will help ensure that heat is distributed evenly across the surface so you get perfect charring on each slice!
– Be careful when transferring pizzas onto or off the stone – due to their high temperature, it’s easy to burn or scald yourself if not done properly.
– Finally, remember that pizza stones are porous and will absorb oil during cooking so they need regular cleaning/maintenance in order to keep them in good condition over time. With proper care and maintenance, your Traeger grill with a pizza stone can give you years of delicious pizzas!
By following these tips and taking the necessary precautions when handling your pizza stone, you can enjoy perfectly cooked pizzas every time with the help of your Traeger grill!
Creative pizza recipes for Traeger and stone
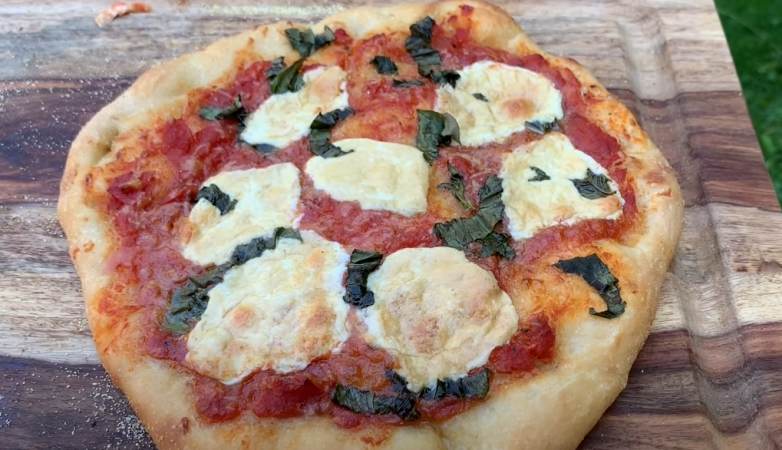
– Margherita Pizza: Start with a fresh pizza dough, spread a layer of tomato sauce over the top, sprinkle on some shredded mozzarella cheese, finish it off with slices of ripe Roma tomatoes and basil leaves. This classic Italian staple is sure to satisfy your pizza cravings!
– White Pizza: Start by spreading an olive oil base onto the dough followed by garlic, ricotta cheese and spinach. Finish it off with a sprinkle of freshly grated parmesan for that added flavor kick.
– BBQ Chicken Pizza: Place strips of pre-cooked barbeque chicken on your prepared dough along with diced red onion and bell pepper slices. Cover the top with generous amounts of shredded Cheddar cheese then bake until golden brown perfection!
– Mexican Taco Pizza: Spread refried beans as a base over your prepared dough then add seasoned ground beef or turkey plus diced onions, jalapeños and olives. Top it all off with Monterey Jack cheese before baking for a delicious dish everyone will love!
– Mediterranean Pie: Create layers of thinly sliced zucchini rounds, black olives, roasted red peppers and artichoke hearts drizzled with olive oil over your prepared dough. Add a sprinkle of crumbled feta cheese then bake until golden brown – the perfect combination of flavors!
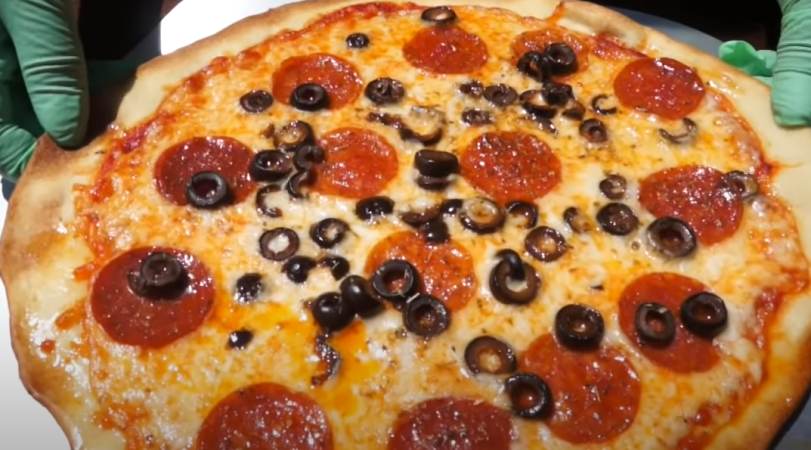
No matter what type of pizza you choose to make, using a Traeger grill with a high-quality pizza stone can help you achieve that perfectly cooked and flavorful crust every time.
Conclusion
Using a Traeger grill with a pizza stone is the perfect way to achieve that perfectly cooked and flavorful crust for any type of pizza. With proper care and maintenance, you can enjoy delicious pizzas every time! Whether it’s Margherita Pizza, White Pizza, BBQ Chicken Pizza or Mexican Taco Pizza, these tips will help ensure your pies come out just right. And if you want to get creative in the kitchen, there are plenty of unique Mediterranean Pie recipes which combine fresh vegetables and herbs for an unforgettable flavor experience. So start firing up the Traeger today – your taste buds won’t regret it!
Read more:How Many Slices In A 16 Inch Pizza?
FAQs
What is a Traeger Grill and Pizza Stone?
A Traeger Grill is an outdoor cooking machine designed to smoke, bake, roast, grill, and even braise food. It uses wood pellets as fuel which add flavor to the food being cooked. A pizza stone is a flat ceramic or metal surface that can be used to cook pizza in a traditional oven or on the Traeger Grill. The stone absorbs heat from the oven or grill and transfers it to the pizza so that it cooks evenly. A pizza stone can also be used for other dishes like bread, fish, and vegetables.
How do I use a Traeger Grill with Pizza Stone?
To get the most out of your Traeger Grill with Pizza Stone, preheat the grill for 20 minutes at medium temperature before adding toppings. When transferring pizzas onto or off the stone, be sure to do so carefully as they will be hot! Once your toppings are added, place your pizza directly onto the stone and allow it to cook for 10-15 minutes until golden brown perfection. Use a spatula to rotate your pizza every few minutes while it’s cooking in order to ensure even heating across its entire surface area.
What types of pizzas can I make with my Traeger Grill and Pizza Stone?
With your Traeger Grill and Pizza Stone you can make all sorts of delicious pizzas! Traditional options such as Margherita Pizza made with tomato sauce, mozzarella cheese and fresh basil leaves are always tasty options; but you can also get creative by making White Pizzas with olive oil bases or Mexican Taco Pizzas with refried beans and ground beef. For those who want something a little lighter but just as flavorful, Mediterranean Pies made with thin slices of vegetables drizzled with olive oil are ideal choices!
Can I use my Traeger Grill with other types of stones?
Yes – although we recommend using ceramic or metal stones specifically designed for pizzas on your traeger grill in order to get best results, you can also use lava stones for grilling meats anf fish or baking breads! Lava stones absorb heat quickly so this means shorter cook times but they should not be used for long periods at high temperatures due to their tendency toward cracking when exposed to extreme heat.
Is there anything else I should keep in mind when using my traeger grill with a pizza stone?
Yes – don’t forget that pizza stones are porous materials which means that they will absorb oils during cooking in order to maintain their non-stick properties over time. As such, regular cleaning/maintenance is necessary in order for them to remain effective for longer periods of time – otherwise they may become difficult (or impossible) to clean properly down the line! Furthermore, if you intend on transferring pizzas frequently between different items on your traeger grill (such as parchment paper), consider investing in multiple stones so that you don’t have cross-contamination issues popping up later down the line.
Does using a pizza stone affect baking time?
Yes – since most modern ovens don’t generate enough heat required for perfect pizzas without some kind of additional help (i.e., preheating), using a pizza stone helps expedite baking time significantly by providing more consistent heating throughout its entire surface area (evenly). In general terms this means that you should see around 10-15 minutes for perfectly cooked pies rather than 20+ depending on what kind of setup/oven you have at home!
Does preheating my Traegar Grill help achieve better results?
Absolutely – preheating ensures that all elements within your traegar grill reach optimal temperature prior to adding any toppings onto your dough base; this allows for more even distribution regarding both top/bottom heat sources which translates into better overall charring from each slice plus less chance of burning (which happens quite easily otherwise!). Preheating times typically range from 15-20 minutes depending on which model you have – just remember not leave it unattended too long lest risk exceeding maximum temperature levels set by manufacturer guidelines!
Are there any safety tips I should follow when using my traegar grill & pizza stone?
As previously mentioned earlier – due to their extremely hot temperatures during use (usually reaching 500F), care must always taken when transferring items either onto or off these surfaces i.e., by wearing protective gloves/aprons whenever possible; furthermore avoid touching any part directly after removing from grill especially if still relatively hot given potential risk associated therewith including scalding yourself inadvertently through contact!
Are there any unique recipes I can try out on my traegar grill with a pizza stone?
Absolutely – there are a variety of different recipes out there which can be easily adapted to your outdoor kitchen setup like Grilled Roasted Garlic and Herb Pizza, Mediterranean Spinach White Cheese Pie, Mexican-inspired Chorizo Quesadillas or even fun Hawaiian-style Pineapple Pies! The possibilities are virtually limitless depending on what ingredients you have at hand – so feel free to experiment away knowing that you’ll always have perfectly cooked pizzas in no time!
Is it possible to use a pizza stone as part of an indoor oven setup as well?
Yes – although most pizza stones are designed for use with grills, they can still be utilized indoors with regular home ovens as long as you take the necessary precautions first i.e., preheating appropriately/ensuring proper insulation between stone and oven surfaces. Furthermore while it’s possible to use baking sheets/pans in place of stones when cooking pizzas inside; such setups tend not provide same kind of crispiness that comes with a pizza cooked directly on its surface – so bear this mind if looking for perfect pizzas!
Ref:

Since a young age, my love for pizza has only grown stronger. As a writer, I am dedicated my career to exploring the art behind a perfect pie. From the crisp crunch of the crust to the perfect blend of savory sauce and gooey cheese, I dedicated to captures the essence of what makes pizza so beloved. With each article, I hopes to inspire others to share in my passion for this timeless dish.